 |
| The wireless back-pack |
 |
| Remote and "key" |
I had read of people having issues getting their back-packs and remotes to work with their cameras but I followed the instructions and updated the firmware on my camera and both the back-pack and remote and as soon as I snapped the back-pack on I was able to turn the camera on and take some pics by using the remote.
 |
| Two new "doors" came with the back-pack |
Then when you need to film you turn on the remote and a few seconds later it connects to the back-pack and turns the camera on. You can then change the shooting mode if you want or just starts recording/snapping. I have noticed that there is a bit of a delay between pressing the buttons on the remote and stuff happening on the camera so you probably won't be able to quickly snap off a shot of something in a hurry.
One little annoying thing is that now I have three items that need charging by usb. The back-pack and camera use a standard mini-usb cable but the remote has a weird setup (so that it remains waterproof). I guess we'll see how much of a pain this turns out to be...
Anyway, the next item on the agenda was to work out where to put the remote on the bikes (so far only the Connie is sorted). The remote comes with the attachment key (top pic) and a wrist strap. The key allows you to hook it onto a keyring or use it for attaching a tether etc. The wrist strap can also be used for wrapping around "things" like ya wrist or the handlebars etc.
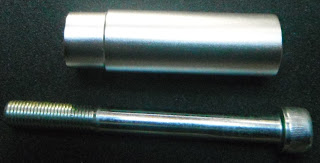
But I had a Projekt D Handy Stick lying around and decided to give that a go.
First up I had to take the bolt out that holds the left-hand side handle-bar on. Man, what a mission - Kawasaki must own shares in lock-tite!
 |
| I just managed to remove this without breaking anything... |
 |
| Handy Stick looking handy |
 |
| Cockpit getting a bit busier... |


That should make the GoPro a little more user friendly. That is the most often complaint I hear is not knowing if they are on or off.
ReplyDeleteYep, hopefully that's all the past now...
DeleteCool farkle!
ReplyDeleteI am interested in getting a GoPro but it means I would have to get a new computer because my operating system would not support it. I thought technology was supposed to make things easier but it doesn't alway work out that way.
Thanks for showing how you attached the GoPro. I've ween wondering how I can mount some of my electronics to my handlebars.
Glad you found the blog useful. One word of warning - all the latest HD cameras require some pretty serious computer grunt to process the video. As I'm normally just uploading videos to Youtube I don't record in HD - it means that the old laptop doesn't have to work so hard.
DeleteLooks great, I like the way you mounted the remote, I'll be interested to see how you like using it.
ReplyDeleteWith the backpac do you have double the battery life? One of my main frustrations is that short battery, on a 4 hour ride you only get about an hour and a half of video .. photos it seems to last a bit longer but not much. I've started turning it on and off while I ride but sometimes you just cant tell which is which eh.
Nope, the battery in the wi-fi pack is just for the wi-fi unit but it will pinch power from the camera when it's battery goes flat.
DeleteThe good thing is that the camera can be completely off - the wi-fi turns it on. And the wi-fi back-pack has an lcd on the back so you can actually see when it's turned on (and it's battery status).
So I should be able to ride along with everything off, turn the back-pack and the remote on and then I'm ready to film. Using it like this should hopefully mean all the batteries last a bit longer.
Time for a ride to test it all...